Page
Add Files and Folders from Computer
These are instructions for adding one file at a time.
If you want to add files in bulk, or organize them using folders, please check out the links to the corresponding pages of this guide.
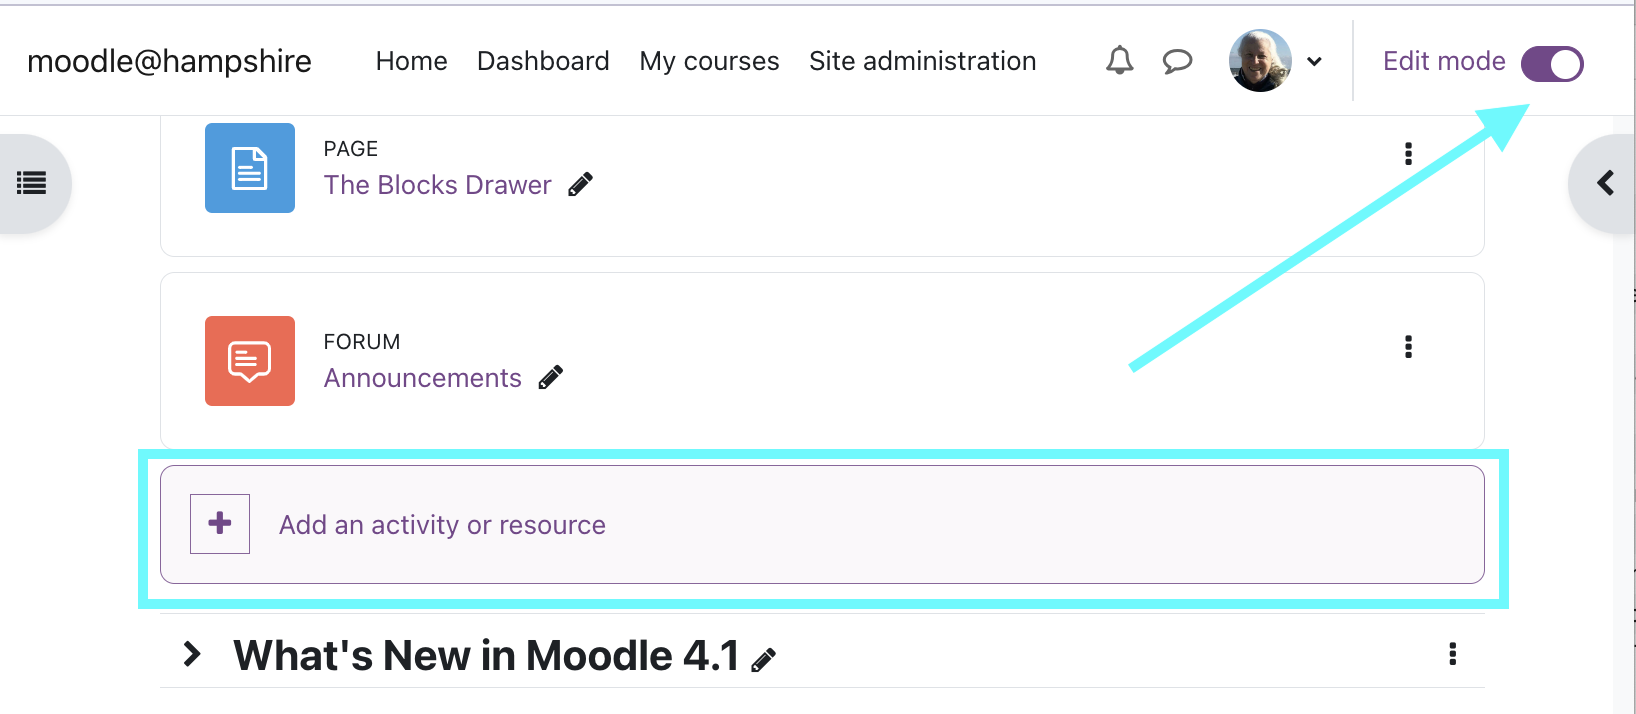
- Click the Turn Editing On toggle
- Add resource or activity
- Open a window in which you can view the files on your computer ("My Documents" or similar). Position this window so you can see both it AND Moodle (in your web browser).
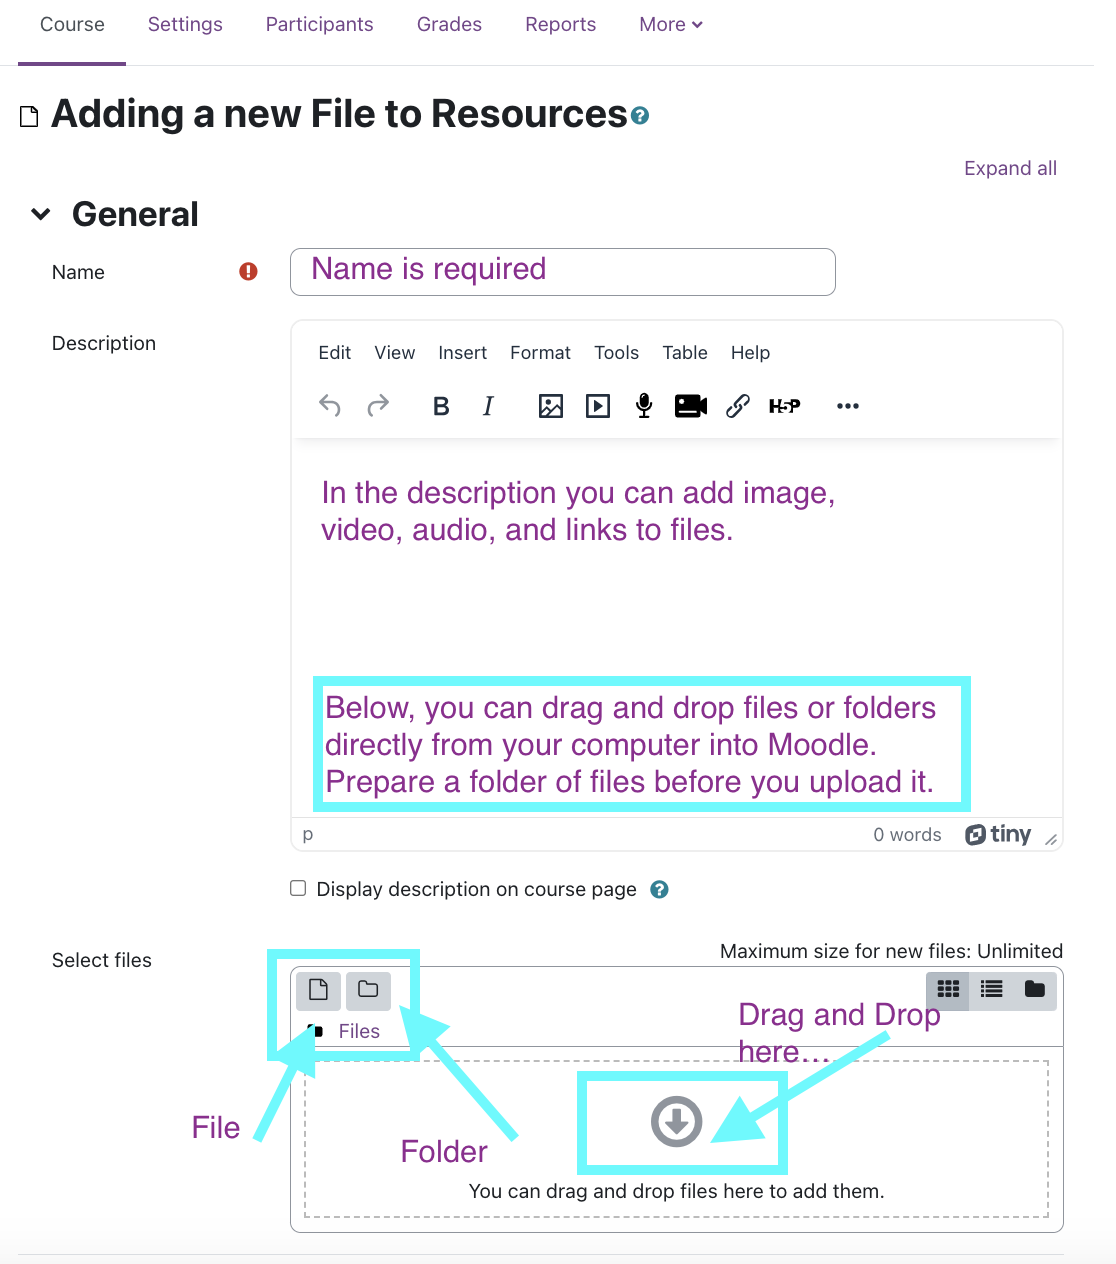
- You can also select multiple files on your computer and drag them over at the same time!
- You'll see your file!
- To rename it, click the little pencil icon right next to it.
- To add a description (which can show up on your main course page), click the Edit Menu and then Edit Settings.
- To move it, click and drag on the crosshair icon to the left.
Last modified: Wednesday, August 23, 2023, 1:11 PM