Page
Add an Image
Wherever you can enter text, you can also add images and media. You can also add images to your main Moodle page by just drag-and-dropping them in.
-
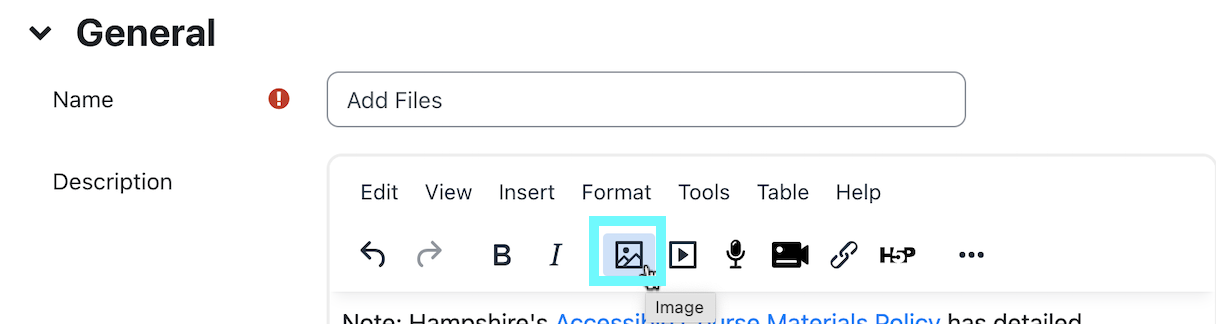
- Click the Insert/Edit image button.
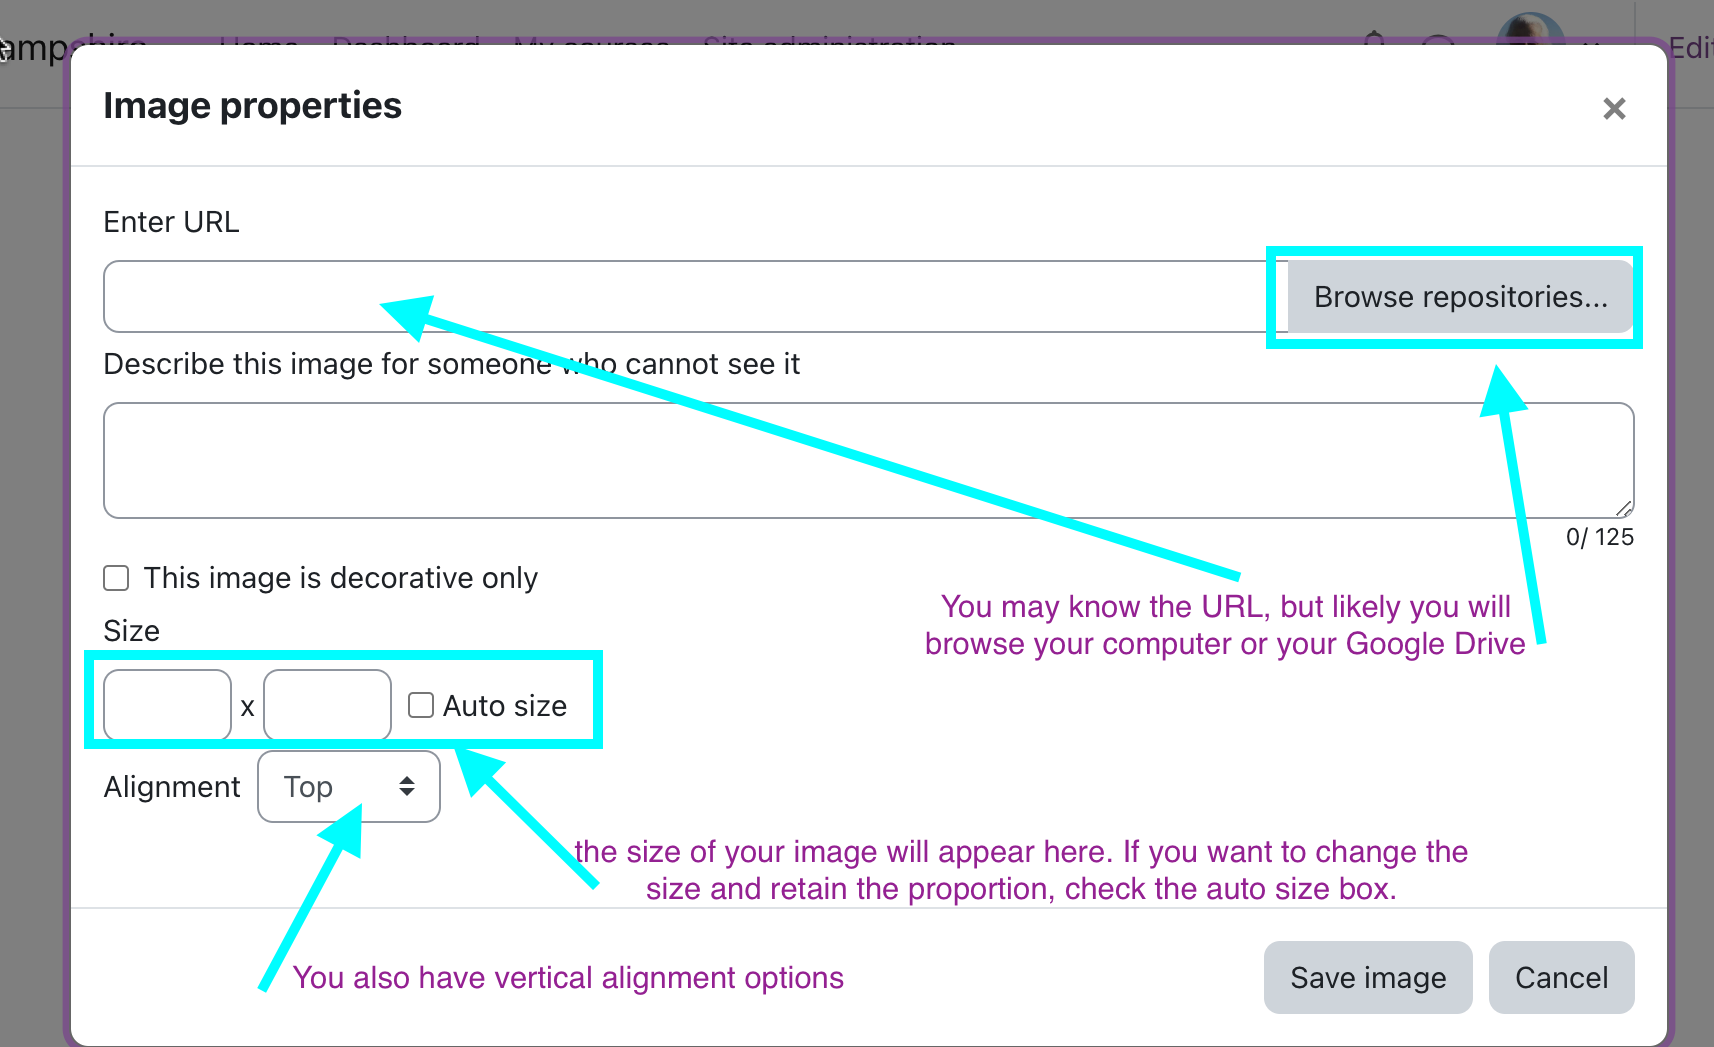
- Click Find or upload an image...
- You can also add an image living on the web by entering it's URL in the "Image URL" box.
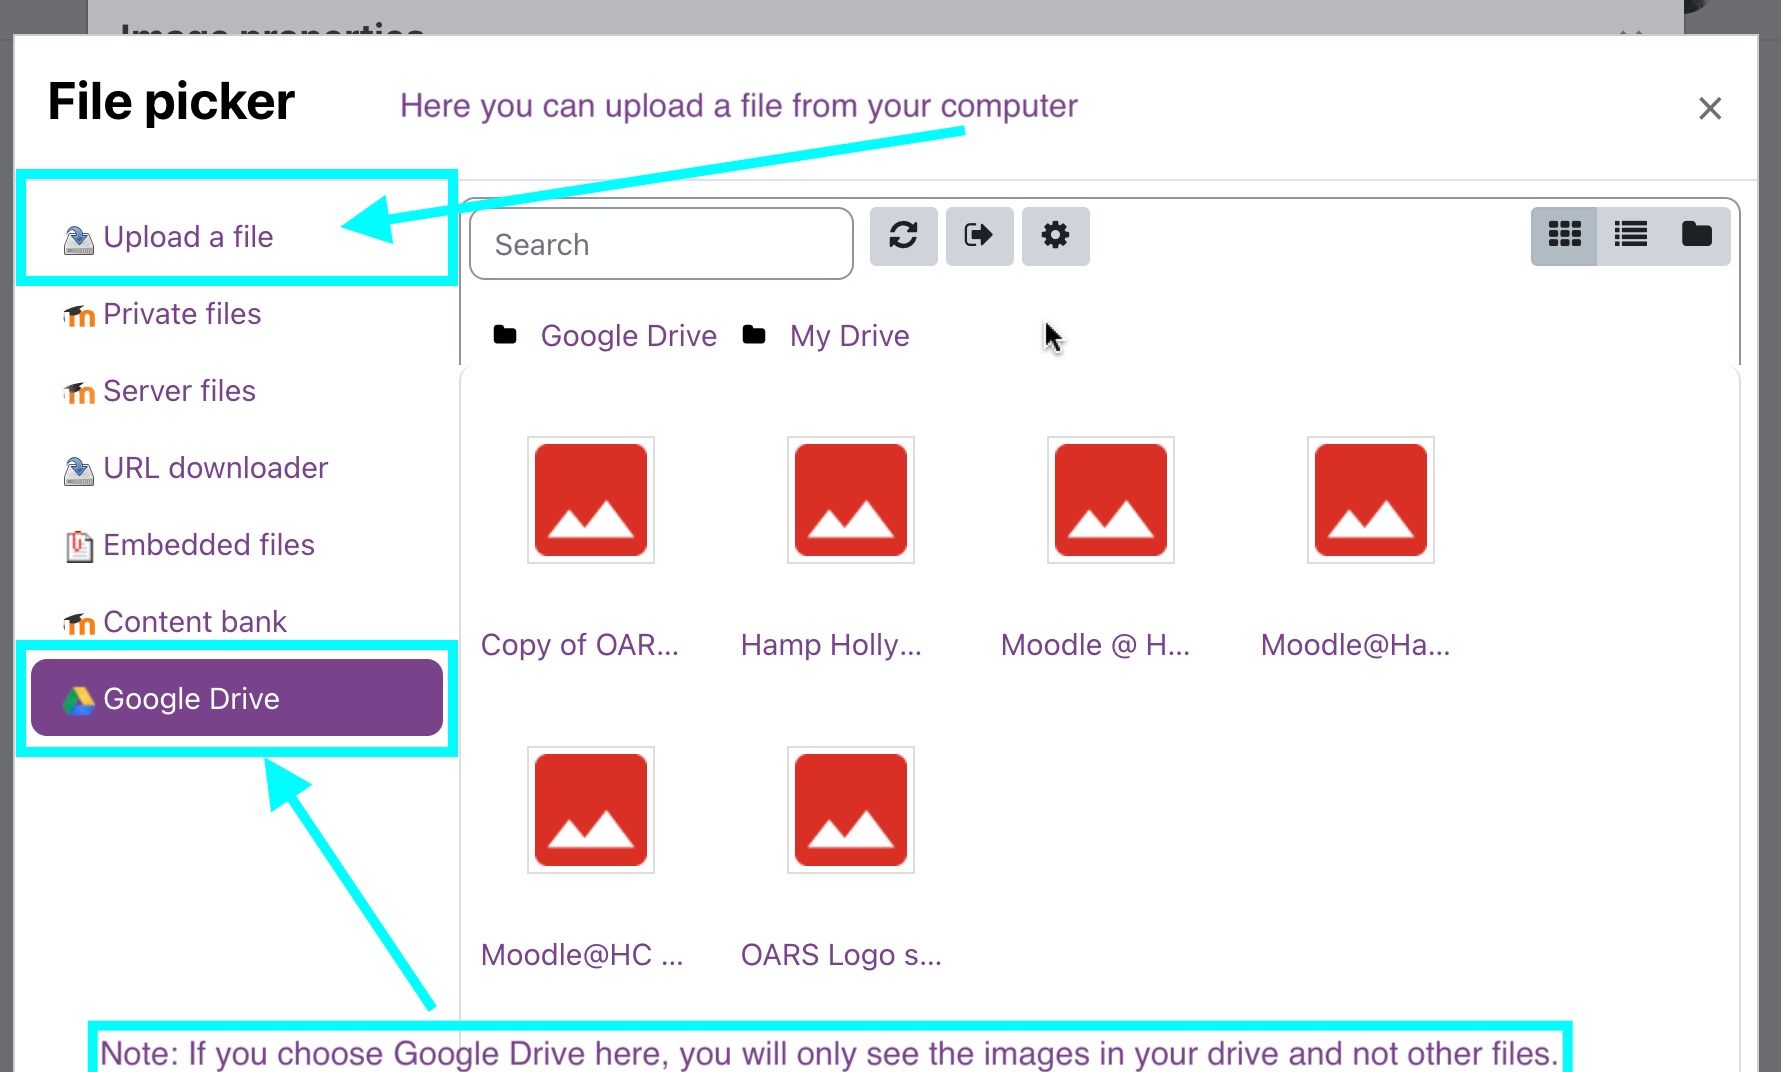
- In the File Picker, click Upload a File, then Choose File. Browse for your image file, then click Upload this file.
- You can also use the lefthand column to retrieve an image from an alternate location like Google Drive, Dropbox, or Private Files.
- You'll see a preview of your image. Make sure you add a description in the Image description box. This will be used to provide alternative text for that image. (visit itaccessibility.hampshire.edu for more info)
- Re-size as needed. (images here are 450 pixels wide)
- If your image is larger than 600 pixels wide, you probably want to re-size it.
- Enter a smaller dimension into the first box, it will automatically adjust the next dimension. 500 or smaller is a safe bet.
- If it's really huge, we recommend making it smaller on your computer and then re-uploading. Re-sizing in Moodle doesn't make it a smaller file size.
- Click "save image".
- You'll see the image within your text.
- Click the image to make changes. Click, hold and drag to relocate. Watch for the line of the cursor in the background to tell where it's going to go.
- Expand the text editor controls for more options...
- Select the image and play with the alignment buttons to have it alongside text.
- To change the image options or sizing, select it and click the add/edit image button again.
- Save your changes!
- Click the Insert/Edit image button.
Last modified: Monday, August 28, 2023, 10:56 AM