Page
Using Quickmail
- Quickmail is now the horizonal menu under "More"

2. Click Compose New Email
3. Choose the recipients for your email.
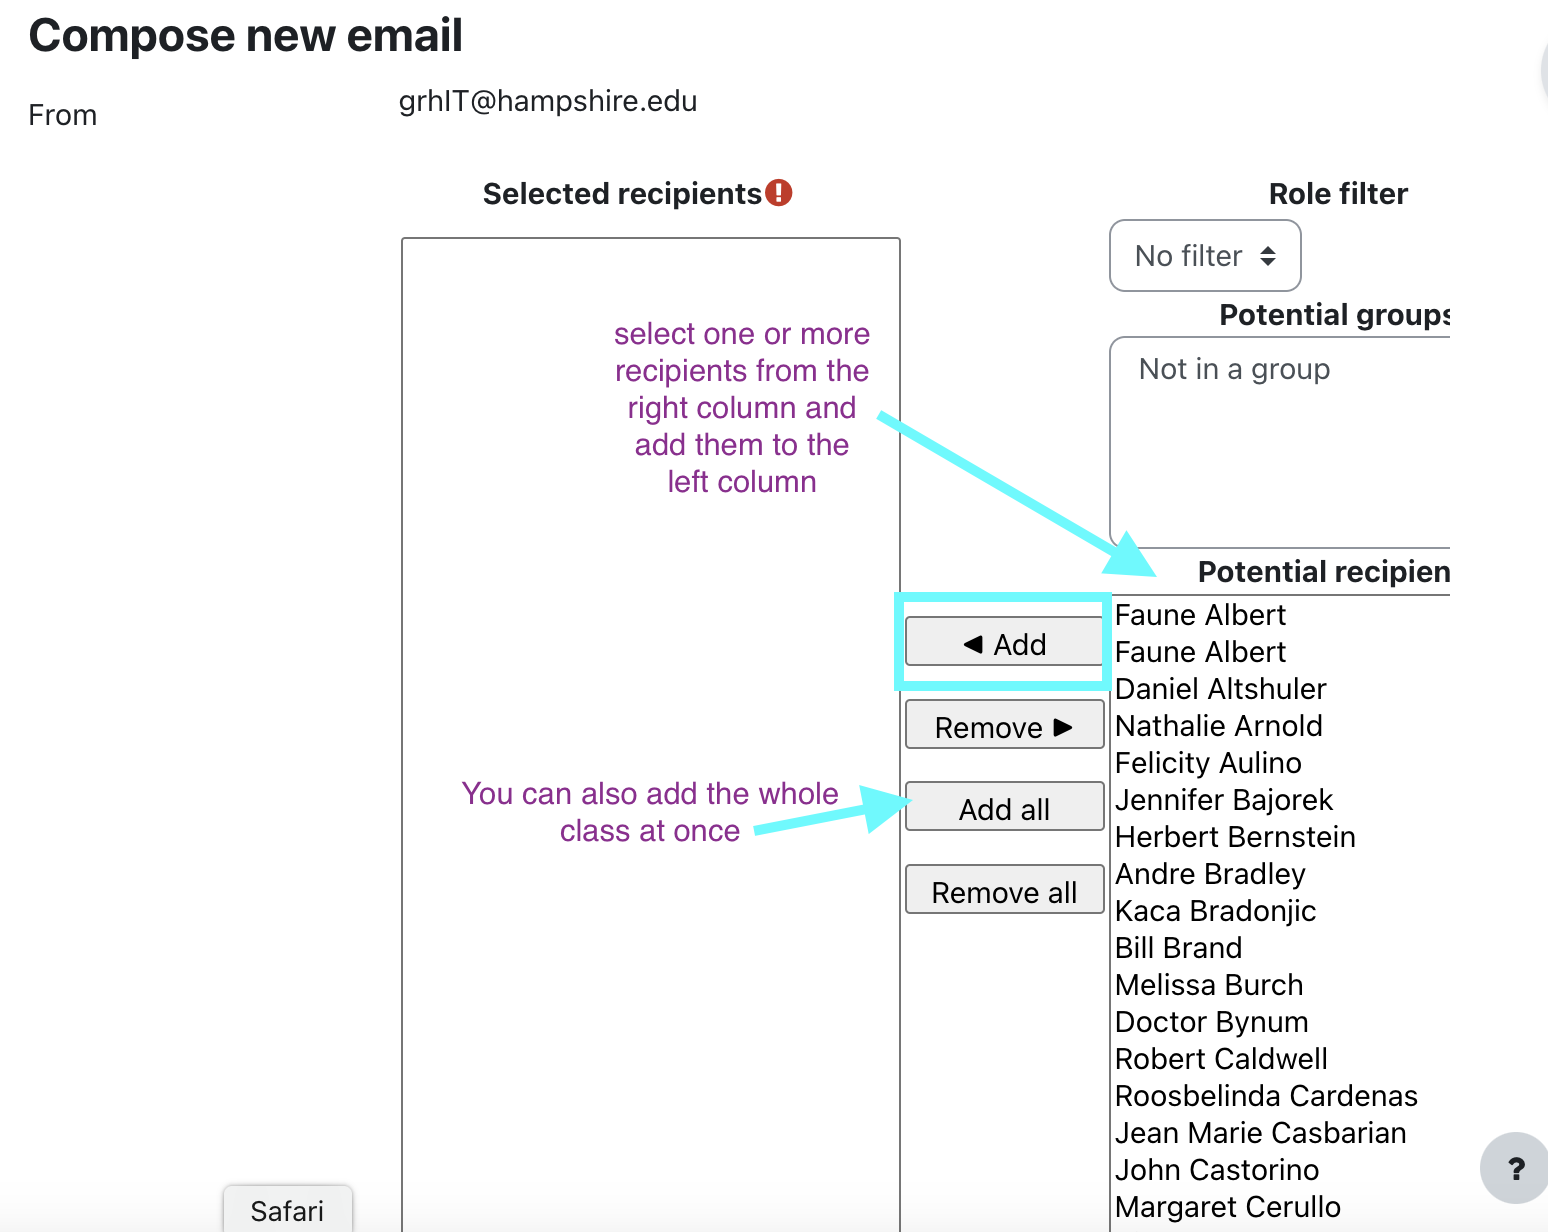
- Choose from the list on the right.
- Click the person's name and...
- Click the add button.
- Or, click Add all.
- You can limit your view to only students, waitlist students, TA's, etc by using the Role Filter menu.
4. You'll see your recipients list on the left.
- You can ignore the business about "sections".
5. Scroll down and compose your email.
- You can add an attachment if you like.
- A subject is required.
- Write your message.
- Select a signature if you've set one up in the Quickmail Block.
- Get a copy of the email. By default, you will receive a copy.
6. Click Send Email.
Or, you can save a draft and send it later.
Note: After clicking send, you will go to a new screen to view your Quickmail history. If it returns you to the Quickmail screen above, the message did not send and there is likely a field missing- check the Subject field or elsewhere for a "this is missing" message.
Last modified: Sunday, July 30, 2023, 10:39 AM